Amazon Shoe Photography Tips for Better Listing Images
Shoe photography for Amazon is one of the more technically demanding categories on the platform. Unlike flat goods or boxed products, footwear has complex three-dimensional structure, reflective surfaces, and texture details that buyers absolutely rely on when making a purchase decision. You cannot hide a bad photo behind a good title when someone is deciding between your sneaker and three others sitting right next to it in the search results.
Amazon requires a pure white background (RGB 255,255,255) for main images, and with shoes this is where most sellers immediately run into trouble. Footwear picks up color cast from almost everything, especially white paper or fabric backgrounds that are not truly neutral. Shoot on seamless white paper under balanced daylight-temperature lighting, and always check your white balance before you start. A gray card is worth the three minutes it takes to use.
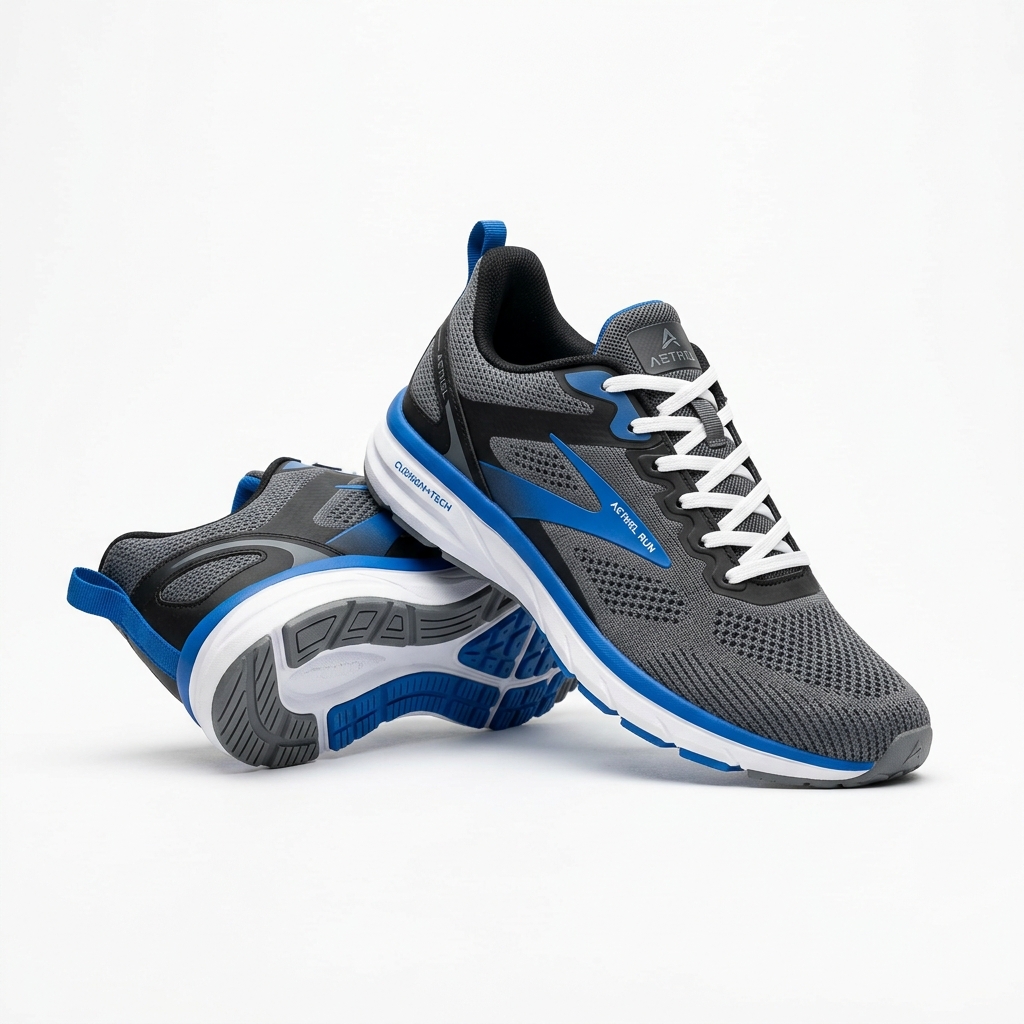
The angle you choose for the main image matters more than most sellers realize. The industry standard for footwear is a three-quarter view from the front left or front right, showing the toe box, the side profile, and a hint of the outsole all at once. This angle communicates shape, volume, and design in a single frame. Straight-on heel or toe shots look flat and perform poorly in click-through tests.
For secondary images, think about what questions a buyer has before adding to cart. They want to see the insole and footbed, the outsole tread pattern, the heel height, any logo placement, closure details like laces or buckles, and the upper material up close. A macro or tightly cropped shot of the upper texture can do more to justify a price point than any bullet point copy. If your shoe has a special technology, like a cushioning system or a waterproof membrane, show it visually. Diagrams or callout overlays on infographic slides work well here.
Lighting setup for shoes should be soft and even but with enough directionality to reveal texture. A large softbox or umbrella to one side with a fill card on the opposite side gives you shadow detail without harsh reflections. Patent leather, metallic finishes, and rubber outsoles all reflect light differently, and you may need to flag your lights or use a polarizing filter to knock down unwanted glare on those surfaces. Matte suede and canvas are forgiving, but anything with a glossy finish needs extra attention.
Example Images
Common Mistakes
Photographing only one shoe instead of a pair
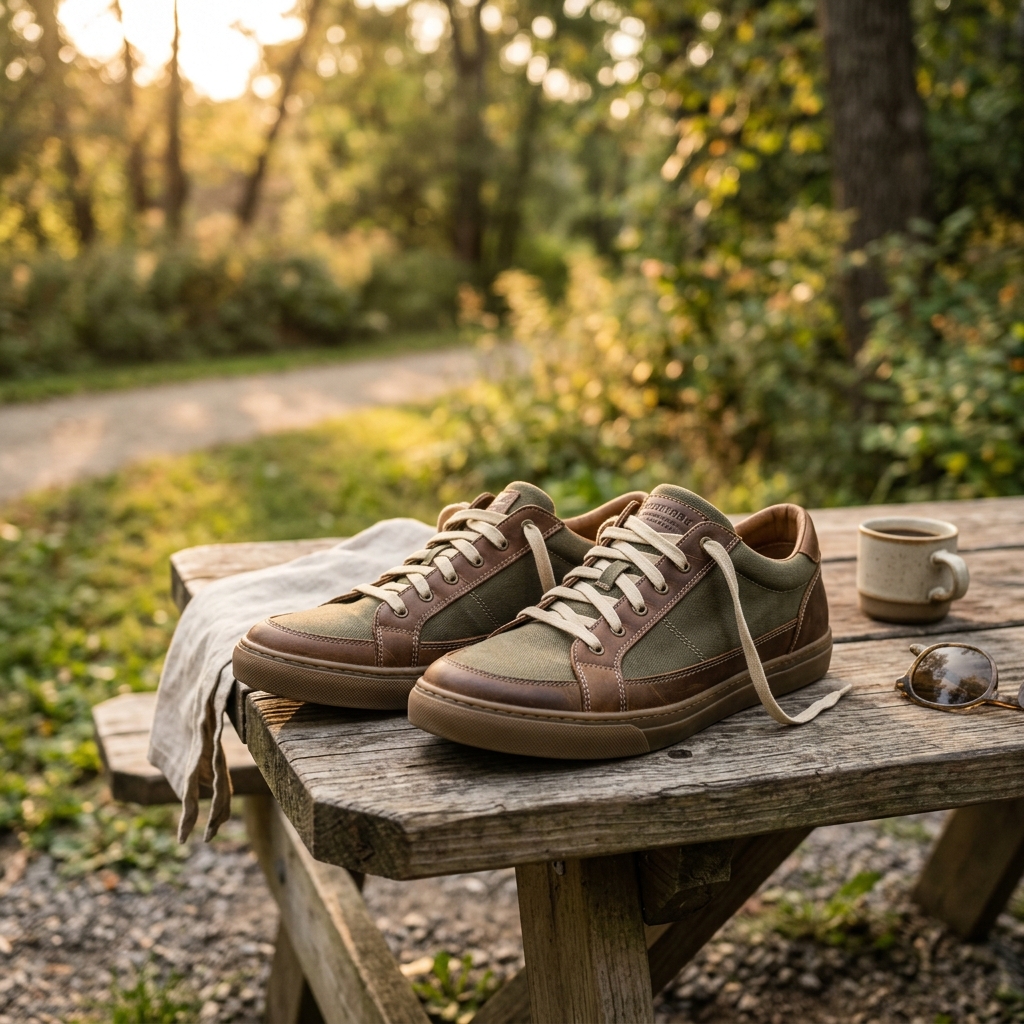
Buyers instinctively expect to see both shoes together or at minimum both angles represented. Showing a single shoe looks incomplete and raises an unconscious doubt about whether the listing is for a pair or a single unit.
Show both shoes together in at least one secondary image, typically arranged in a heel-to-toe staggered layout. For the main image it is acceptable to show one shoe on a white background, but add a clearly paired lifestyle or studio shot in image slot two or three.
Letting the shoe collapse or lose its shape during the shoot
An unstuffed shoe photographs poorly. Leather and fabric uppers sag, the toe box caves in, and the overall silhouette looks cheap and shapeless, which directly hurts perceived value.
Stuff every shoe with acid-free tissue paper or use purpose-built shoe forms before shooting. Fill the toe box fully, prop the heel counter upright, and check the shape from the camera angle before you trigger the shutter. This single step makes a dramatic difference in how premium the shoe looks.
Shooting on a background that is off-white or grey instead of true white
Amazon's algorithm and QC team flag images that fail the pure white background requirement, which can suppress your listing or trigger a policy violation. More practically, an off-white background makes your shoe look like it came from a grey-market seller rather than a professional brand.
Use a proper white seamless paper background, at least 53 inches wide, and light the background separately from the shoe. Check the RGB values of the background in Photoshop or Lightroom after shooting. If the numbers are not sitting at 255,255,255 or very close, adjust the background exposure or use a selection mask to bring it to true white in post.
Skipping the outsole shot
Buyers check outsoles for traction pattern, heel stack height, and overall build quality. Athletic shoe buyers in particular use the outsole to assess durability and intended use. Leaving this image out forces a buyer to either guess or click away to a competitor who did include it.
Add a dedicated flat-lay shot of the outsole as a secondary image. Place the shoe with the sole facing directly up or prop it at an angle so the tread pattern is fully visible. Make sure the lighting reveals the depth and texture of the lugs or tread, not just a flat silhouette.
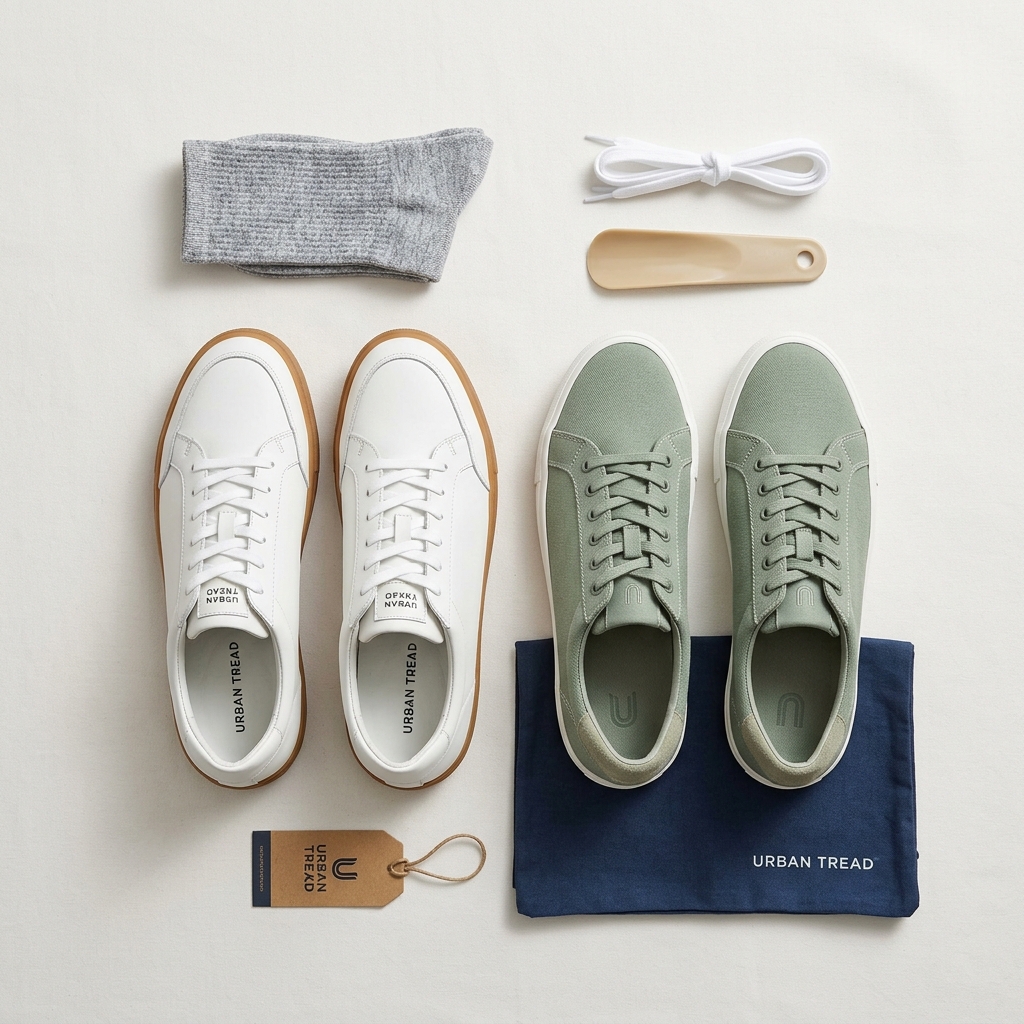
Using inconsistent scale or pairing across a size or color variation catalog
When a seller has multiple colorways or sizes, inconsistent cropping and angles across variation images confuse buyers and make the listing look unpolished. It also makes it harder for buyers to compare colors at a glance.
Create a shot list and a fixed camera position before you start a multi-variation shoot. Use the same focal length, the same crop, and the same lighting setup for every colorway. If your camera has a grid overlay, use it. Consistent framing across a variation set looks intentional and builds trust.
Skip the trial and error
Get Amazon-ready Shoes & Footwear photos without the guesswork
Upload one product photo. ProductScene generates a complete Amazon gallery — every image slot, correctly sized, styled for the platform.
Try free